This is yet another little quick step by step on how to get quick and easy exaggerated lips. In this little tutorial I will be using Rimmel London products purely because they are the products that work best for me :)
. First of all you will need a lip liner. For a full lip effect, choose a liner that is a few shades lighter than the lipstick you are using. I like plump pin-up style lips so I use a Rimmel liner in "indian pink". Secondly you will need your favourite lipstick, I use Rimmel moisture in "diva red". So far it is one of my favourite products to date, if you like lovely soft kissable lips then it is worth a try!
Some people do like to apply a little lip balm before doing lip make-up, I don't do this that often but when I do I like to use something mild that doesn't smudge my lips stick. Dr Organic royal jelly serum is my favourite when I do take the incline to balm up :)
Start from the inside of your top lip and work outwards. Apply the liner OUTSIDE of your natural lip line.
Work downwards to the bottom of your top lip always keeping just slightly outside your lip line. When you are done just repeat the process again on the opposite side.
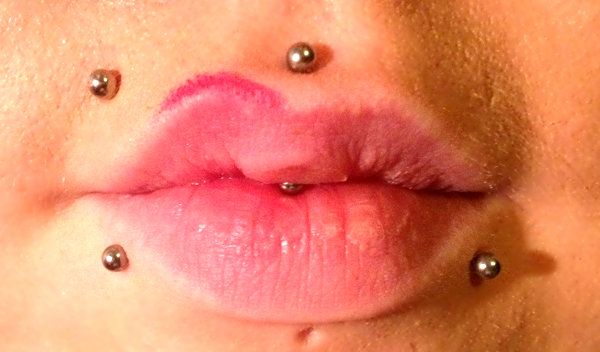
When you have finished your top lip you can start on the bottom begin at the corner of your mouth and ending at the opposite corner, always keeping just slightly outside your natural lip line. When you have finished your basic line outline you can now begin to bring the liner down into your lips. Again start at the inside of your top lip and just colour down into about the middle of your top lip. Use the same technique for the bottom and you will end up with the above picture (hopefully tidier than mine n__n)
When you finish your liner you can now start to colour in your lips. You can use a lip brush but as the outline is already there it will be fine to apply the lipstick directly to your lips. Work the colour out towards the lip liner. Don't be afraid to take it right up to the outline of your liner!
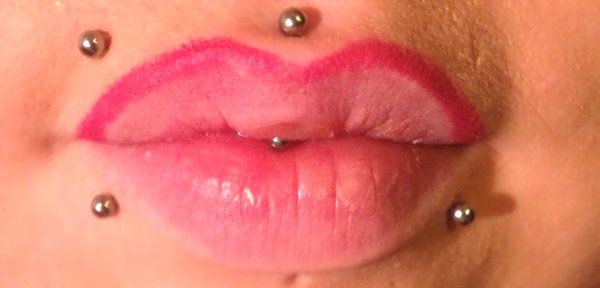
Here is the finished product! It is simple and easy and only takes a few minutes.
Hope you enjoyed this little step by step!
xxxxxxx


No comments:
Post a Comment